


Coinbase, as its name implies, is the home of coins—in this case, cryptocurrency coins. You may think of it as the McDonald’s of crypto coins, especially since it became the favorite and most popular cryptocurrency exchange within the United States by trading volume.
The cryptocurrency exchange launched in 2012 amassed its first one million registered users within just two years. Today, its potential as a high-flying cryptocurrency exchange manifests in over 56 million registered users and a whopping quarterly trading volume of $335 billion.
Since 2012, early Bitcoin users have been buying and exchanging coins on Coinbase. The Delaware-based cryptocurrency exchange platform was the first publicly-listed crypto exchange on Nasdaq—and this made it even more popular as it reached its highest number of DAUs (Daily Active Users) earlier in 2021.
Now available in over 100 countries, Coinbase initially allowed for Bitcoin trading only, but it steadily began to include other cryptocurrencies to support its comprehensive concept. Since its launching for Bitcoin trading, it has become home to more than 50 cryptocurrencies, including Ethereum, Bitcoin Cash, Litecoin, XRP, etc.
You might want to take a look at the complete Coinbase review we conducted before you get started. We checked out everything about the platform, including its features, ease of use, security, customer support and so much more.
But, first things first! To start your crypto adventure on Coinbase, you’ll need to create an account. In this step-by-step guide, we’ll walk you through how does Coinbase work, how to use it to buy, sell, trade and earn cryptocurrency and overall how to step up your Coinbase game. Let’s get started, shall we?
How to Use Coinbase – Creating an Account
Creating a user account on Coinbase is a very straightforward process, as seen in the following steps:
#1. Open the Coinbase Homepage to Sign up
To begin creating your account, go to the Coinbase homepage.
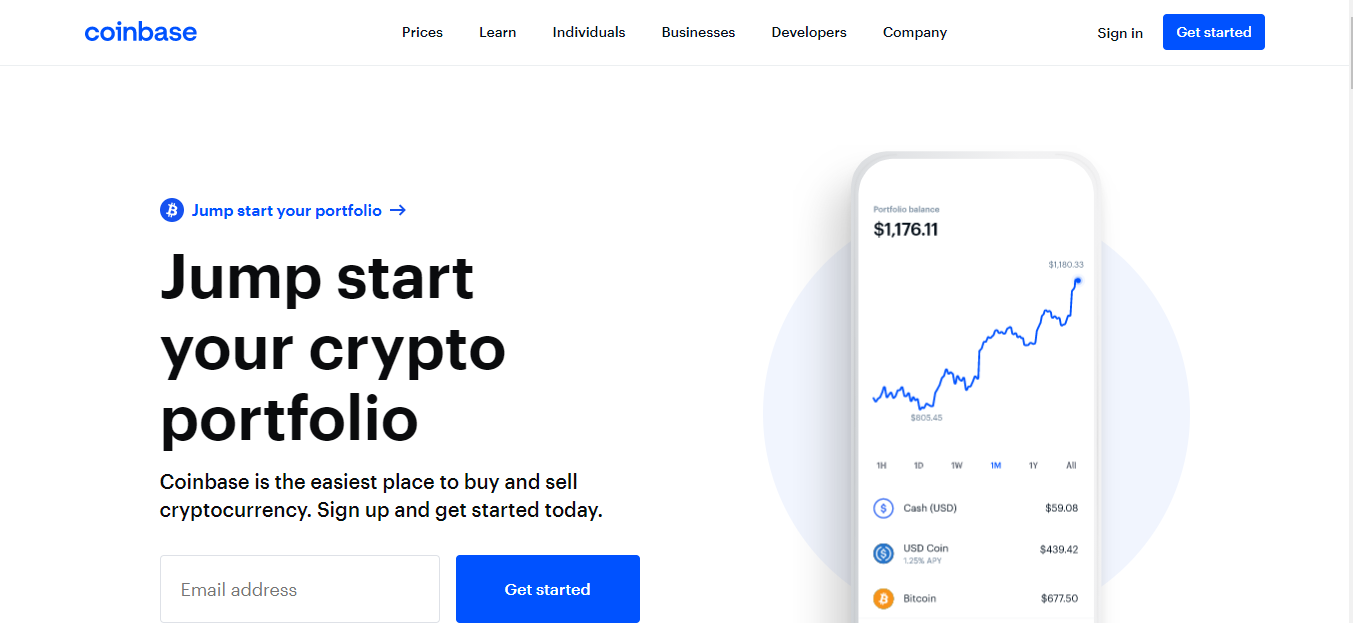
You’d find the “Get Started” button highlighted in blue at the top right-hand corner of the page. Tap on the button.
#2. Enter Your Email Address and a Password
After you’ve clicked on the “Get Started” button, the next page would be the preliminary registration page. You’d be required to fill in your first and last names. Ensure to enter the name on your passport or driver’s license to avoid delaying your identity confirmation later.
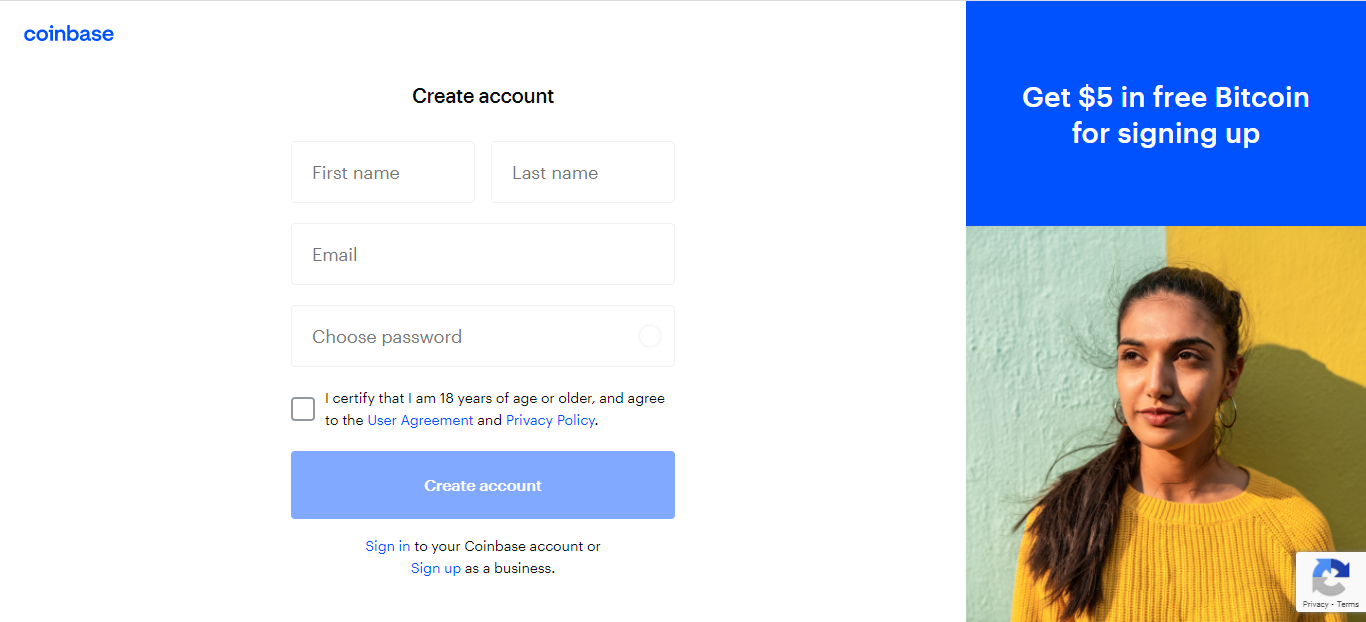
Below that, enter your email address and fill in a unique and secure password. A strong password is usually a combination of letters (lowercase and uppercase), numbers, and special characters.
#3. Complete the Security Check
Read and check the “User Agreement/Privacy Policy” and the “I am not a robot reCAPTCHA” boxes. Then, click “Create Account” to continue to the next step.
Coinbase will send a confirmation email to your chosen email address. Open the email and click on the confirmation link to activate your Coinbase account.
#4. Confirm Your Email Address
You’d receive a confirmation email at the email address you provided. The reason for the confirmation email is to check spam accounts and improve your account’s security. Go to your email inbox and open the email from Coinbase. If there’s any difficulty finding the mail, check your junk folder to ensure you didn’t receive it there.
There, you will find the confirmation link. Click the confirmation link. You’d be required to sign in afresh with the email and password you entered. Signing in will lead you to a new browser window to complete your email verification process.
#5. Verify Your Phone Number and Enable SMS Two-Factor Authentication
Once you’ve confirmed your email, Coinbase takes you through a two-factor authentication (2FA) process to further strengthen your account’s security. The reinforced protection ensures that no one else logs into your account, even if they have your email address and your password.
That is to say, only someone with all your login details and access to your phone can access your account—which makes it extremely difficult to hack your account. The default two-step authentication process is through SMS. Below is how to do your two-step authentication through SMS
- Choose the country of your phone number—that’s if google has not chosen it automatically.
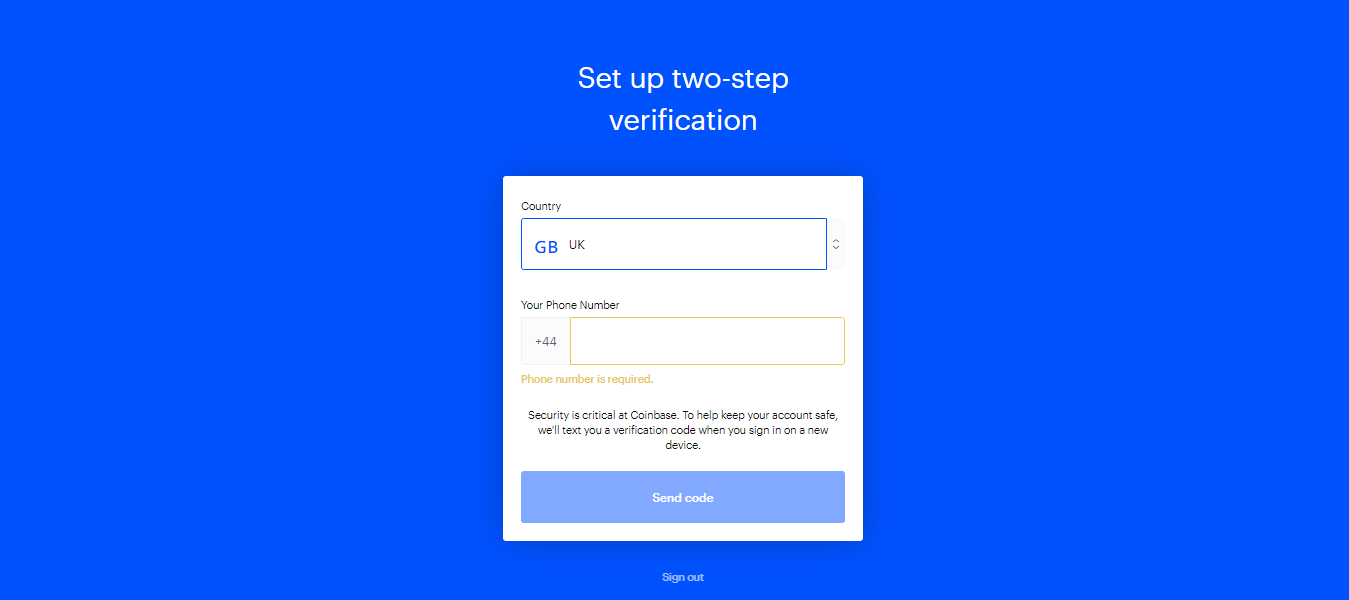
- Fill in your mobile phone number leaving out the first zero.
- Click the “send code” button. Coinbase will send an SMS to the mobile phone number you recently entered.
- Pick up your phone and find the SMS message from Coinbase. It should be a 7-digit code. Click “Resend-SMS” if you didn’t receive the code to get a new one.
- Enter the code and click “Submit” to complete two-factor authentication. Once your phone number is verified, you will see the page shown in the image shown below.
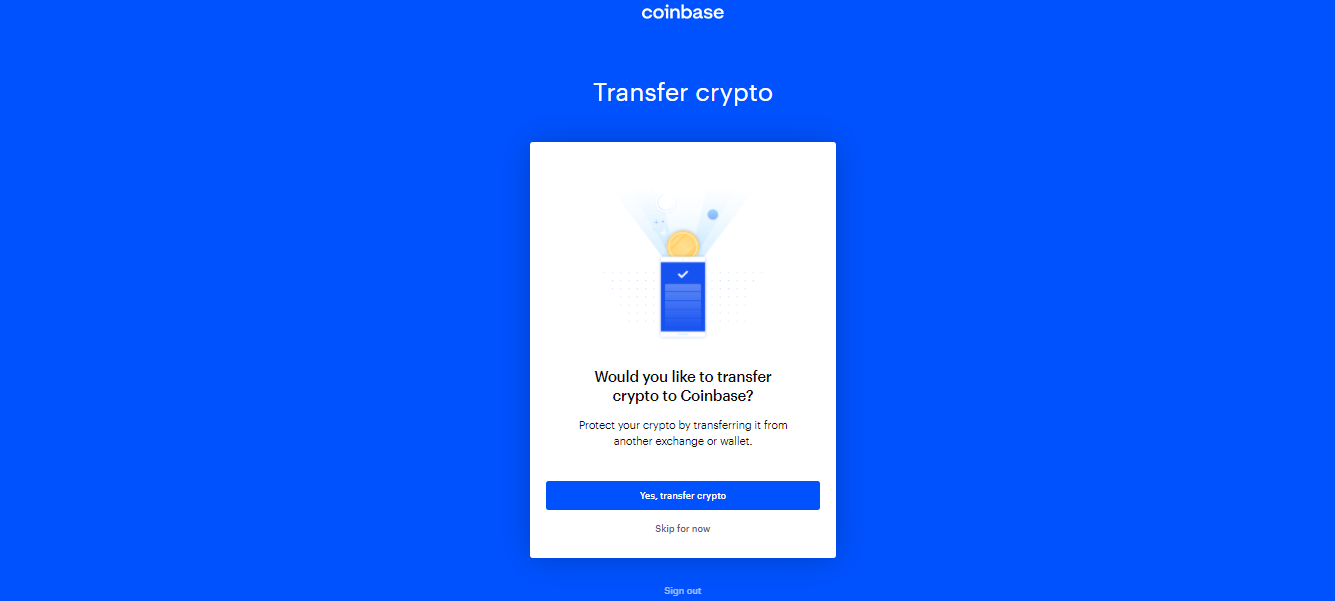
It means you are now eligible to transfer your crypto from some other wallet or exchange to Coinbase. Click “Skip Now” below the page to continue to the next level of your registration. Congratulations! That will take you to your Coinbase dashboard.
There are other advanced two-factor authentication methods. However, you can use one of them after you have set up SMS authentication. Using any of the advanced authentication methods will automatically disable SMS authentication. In other words, you can only use one 2FA authentication method on Coinbase.
You can use TOTP authentication or security keys (considered the best 2FA authentication method). We’d discuss those more elaborately below. To check your 2FA settings, go to your account settings by clicking the profile picture icon in the top right corner and clicking “Setting.”
How to Do KYC Verification on Coinbase
After verifying your email and completing the compulsory two-factor authentication on Coinbase, you’d also undergo a more advanced verification called KYC (Know Your Customer). KYC helps Coimbase—as it does other crypto exchanges—to identify and confirm that you are who you say you are.
There are multiple steps to it, and the aim is to prevent people from creating and using fraudulent accounts. Verifying your identity is a must-do on Coinbase to continue using your account.
Your account limit will be restricted if you don’t verify your identity. The reason is that Coinbase uses verification levels, purchase history, account age, method of payment, and other factors to determine your account limit.
Besides, Coinbase may collect some of your data during verification—to improve your products, enable some services, and inform you of new developments depending on your preferences.
So, if you don’t verify your account, you will come behind in general user experience and access to products and services. That doesn’t sound like what you want. So let’s look at how to do KYC verification on Coinbase;
Enter Your Personal Details
Coinbase will need you to enter your personal information. These details must be the same as what’s in your valid, government-issued identification card. The reason is that you’d be required to submit a copy of your ID later. The details include:
- First name and last name
- Date of birth
- Address
- Postcode
You can enter your personal details from your Coinbase dashboard.
- After you’ve signed into Coinbase, navigate to the top right-hand corner of your dashboard. Click on your profile icon close to the “Send/Receive” button, then tap on the “Settings” button.
- Click the “Profile” button above the page. You can now enter your personal details.
- Navigate to the bottom of the page. You’d see “Change your legal name by verifying an ID document here.” Click the blue link on the “here” to start document verification
Answer the Following Questions
Depending on your location, Coinbase may ask you to answer some of the following questions after filling in your personal information:
- “What do you use Coinbase for?”
- “What is your source of funds?”
- Current Occupation
- Employer
- Last four digits of your SSN (for US users)
Click “Continue” to finish the process. Then, wait for a while to get further instructions via email.
Upload Your Photo ID/Verify Your Identity
Next, Coinbase will ask you to verify your documents in compliance with anti-fraud laws. The reason is to improve your account’s security and make sure that no one except you changes your payment details.
Another primary reason you’d be required to verify your identity is to improve and personalize the products and services you receive. However, Coinbase does not accept emailed copies of your ID for verification purposes. For US users, Coinbase will only accept a state-issued ID like Driver’s Licence or Identification Card.
While for non-US users, Coinbase will require a government-issued photo ID, National Identity card, or Passport. Coinbase will not accept US passports, Green Cards (US Permanent Resident Cards), School IDs, Medical IDs, Residence permits, Temporary or paper IDs, Military IDs, and Public service cards.
The following tips will help you to hasten up your ID verification
- Use the updated version of the Google Chrome browser
- Take a photo with your phone’s camera; as it produces the most precise photo
- Ensure your environment is well-lit, preferably with natural lighting.
- Using direct lighting on your ID can prevent glare.
- Avoid holding the ID in your hands as that may confuse the focusing lens
- A plain background is best for the ID photo
- If you’re using a webcam, try to set your ID flat down, then move the webcam instead of the ID.
- If ID verification doesn’t go through, try clearing your browser cache; restart your browser, and try again.
- Wait for 15 to 30 minutes in between trials.
On your screen, you’d need to “Select the ID Type,” with options for “Passport,” “Driver’s Licence,” or “National ID Card,” as shown below:
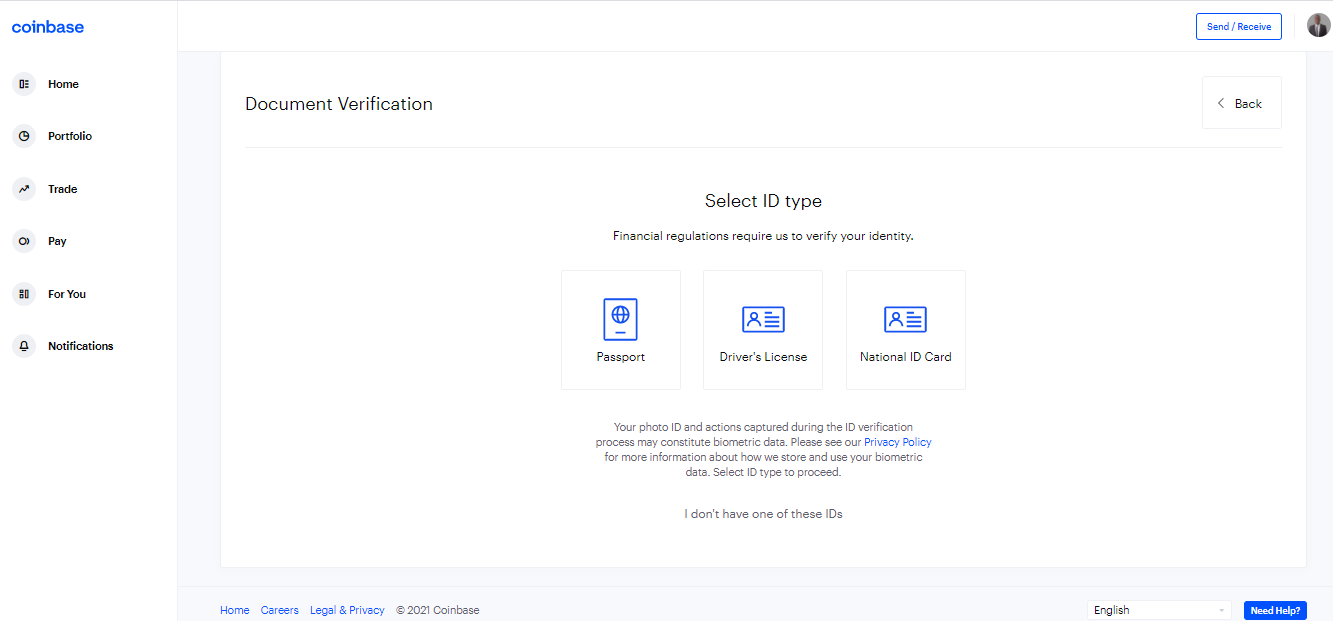
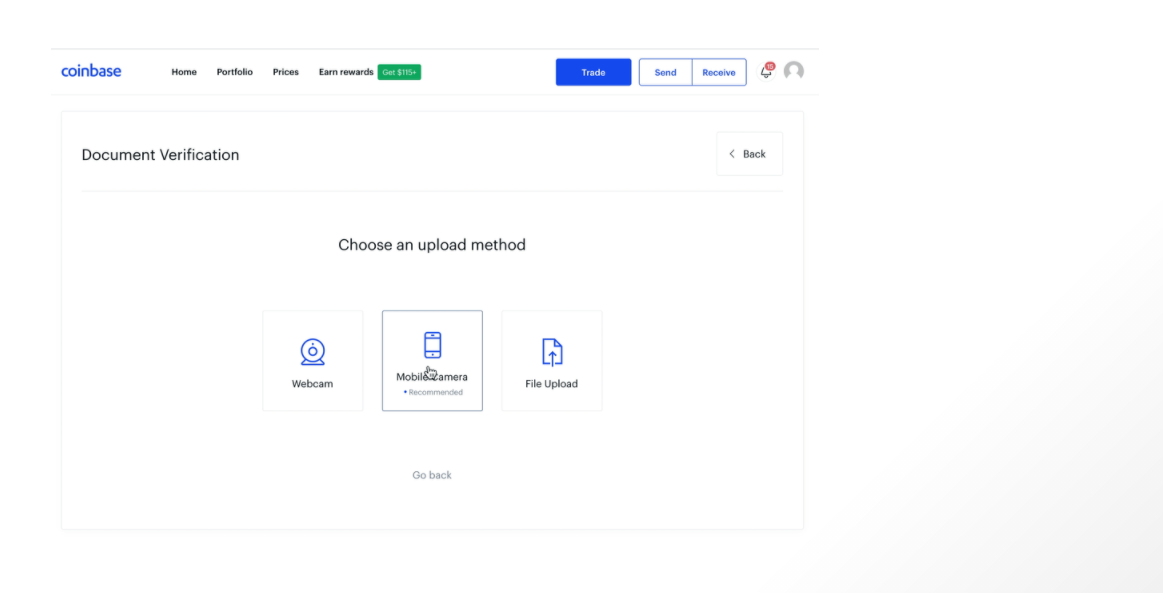
Tap on the ID option you prefer and then choose any of the upload options that will appear: mobile “Camera,” “Webcam,” or “File Upload.” Coinbase recommends taking the photo with your mobile phone:
You’d be required to take/upload photos of both the front and back of your ID, one after the other.
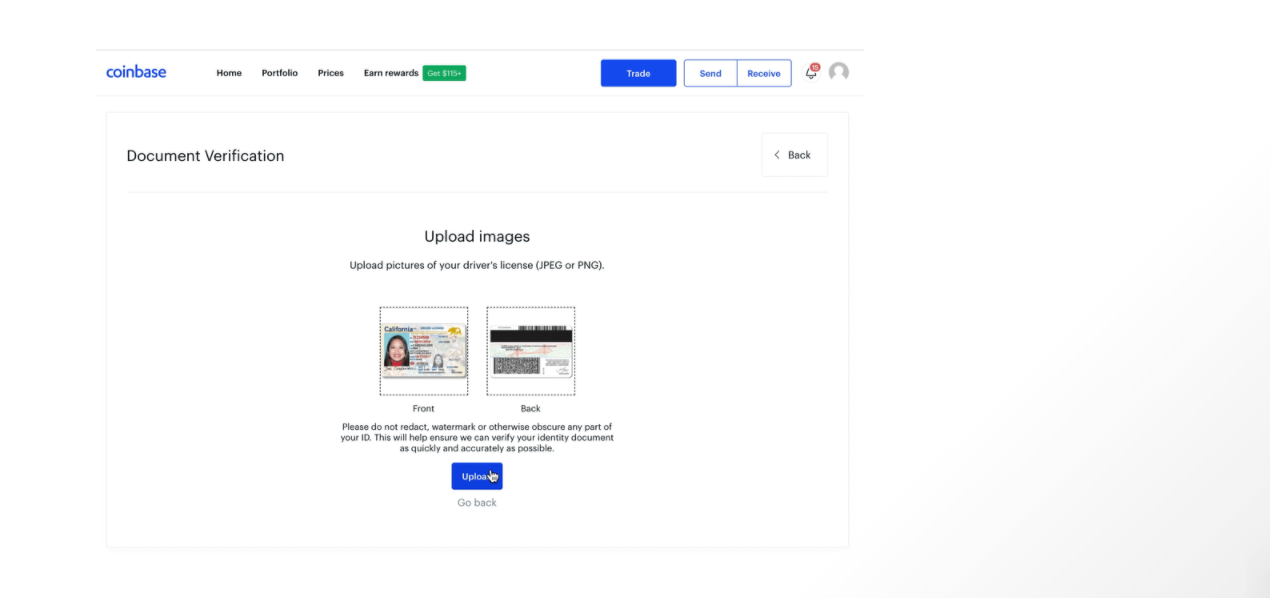
After you’ve successfully inserted the images, and made sure they are clear enough, click the blue “Upload” button below the page to initiate the verification process.
Wait as Coinbase verifies your photo ID. You will get an email from Coinbase as soon as your verification becomes successful.
How to Link a Payment Method to Your Coinbase Account
After you’ve verified your identity, you’d be required to link a payment method to complete your account. This payment method will be the default payment method with which you can perform transactions on Coinbase. However, payment methods differ with country, and you can only use a method that your country is permitted to use.
Choose from the payment options that are available in your country. Most people will go for the “Bank Account ” or “Debit/Credit Card” option if their country is eligible for any of them.
How to Buy Cryptocurrency on Coinbase
You can buy crypto worth as low as two units of your local currency, for instance, $2 or €2. To buy crypto on Coinbase, you can use Coinbase’s website or buy from your Coinbase mobile app. How to buy crypto using either method is explained below;
Buying Crypto on Coinbase.com
- Log in to Coinbase.com
- Click Buy/Sell on the page’s upper right-hand corner
- Select Buy to choose the crypto you want to buy
- Fill in the amount of crypto you want to purchase. You’d see an option to choose the amount in denominations of the specific cryptocurrency or use your fiat (local) currency.
- Choose your preferred payment method.
- Tap on Preview Buy to review your transaction. You are free to go back if you want to make a change.
- If you’re satisfied with the preview, then go ahead and click Buy to authorize your crypto purchase.
You can make your purchase a recurring transaction by clicking One Time Purchase and selecting the frequency at which Coinbase should renew your purchase.
Buying Crypto on Coinbase’s Mobile App
- Click the forward-backward arrow icon below the page.
- Tap Buy and choose the crypto you want to buy.
- Fill in the amount of crypto you want to purchase either in crypto or in denominations of your fiat (local) currency.
- Tap on Preview Buy to review your transaction. You’re free to go back and make changes.
- After double-checking to ensure your details are okay, click Buy and authorize your purchase.
Like buying on the website, you can also choose to make your purchase a recurring transaction and decide how often you want it to renew.
How to Cash Out or Sell Your Crypto on Coinbase
On Coinbase, you can only sell your crypto into your Coinbase fiat wallet. But the exciting part of selling on Coinbase is that there’s no limitation on the amount of crypto you can sell to your Coinbase fiat wallet.
Once you’ve sold to your Coinbase fiat wallet, you can withdraw your balance to your US bank account or buy crypto on the platform. Here’s how to sell crypto on Coinbase:
- Open the Coinbase website and choose Buy/Sell at the top right-hand corner of the page.
- Click Sell
- Choose the cryptocurrency you’d like to sell and fill in the amount you’d like to cash out.
- Tap “Preview sell” and then “Sell now” to authorize the transaction.
There’s usually a brief holding period during the cash out of your “sell” from the Coinbase fiat wallet to your bank account. However, the holding period doesn’t stop you from selling as much crypto as you like to sell at your preferred price.
How to Trade on Coinbase
Just like other top crypto exchanges around, Coinbase also allows you to trade your crypto assets. However, you will not be able to trade crypto directly on Coinbase. You’d need to sign in to Coinbase Pro to explore the crypto trading features. Here is a step-by-step guide on how to trade crypto on Coinbase Pro;
Create a Coinbase Pro Account
You can create a Coinbase Pro account from scratch at https://pro.coinbase.com/. But it will be much simpler and faster if you have an account at Coinbase.com! You can follow the steps above on how to create a Coinbase account to create one for yourself.
If you have a Coinbase account already, then you can use the same email address to log in to both your Coinbase and Coinbase Pro accounts. Using the same email automatically links your Coinbase account to your Coinbase Pro account and makes funds transferable between the two accounts.
It’s important to know that an individual can only use one account with Coinbase.com and Coinbase Pro. So, if you already own a Coinbase account and want to create a Coinbase Pro account, you should use the same email address to log in.
To create a Coinbase Pro account, visit Coinbase Pro and select “Login.” If you’ve already logged in to coinbase.com, you will need to accept the User Terms on Coinbase Pro. Then, provide any additional information you may be required to offer, and you are all set!
Choose a Currency Pair
To choose a currency pair and start trading on Coinbase Pro,
- Click the “Trade” tab on the left side of your Coinbase Pro dashboard, and you’d find a lot of cryptocurrencies available to trade
- Click on “Select Market.” You will find many categories of tradable currency pairs. In the “All” tab, you can find all tradable pairs like BTC-EUR (Bitcoin against the Euro), LTC-GBP (Litecoin against the Pound Sterling), etc.
In a “Buy” trade, the first currency is the buying currency, e.g., in BTC-EUR, you’re buying Bitcoin against the Euro. Entering a “Sell” trade, you’re selling Bitcoin against the Euro. You can also search any currency in the search box to see its tradable pairs.
- Click on a currency pair or market you’d like to trade to select it
- After selecting your trading pair, you can move over to the chart.
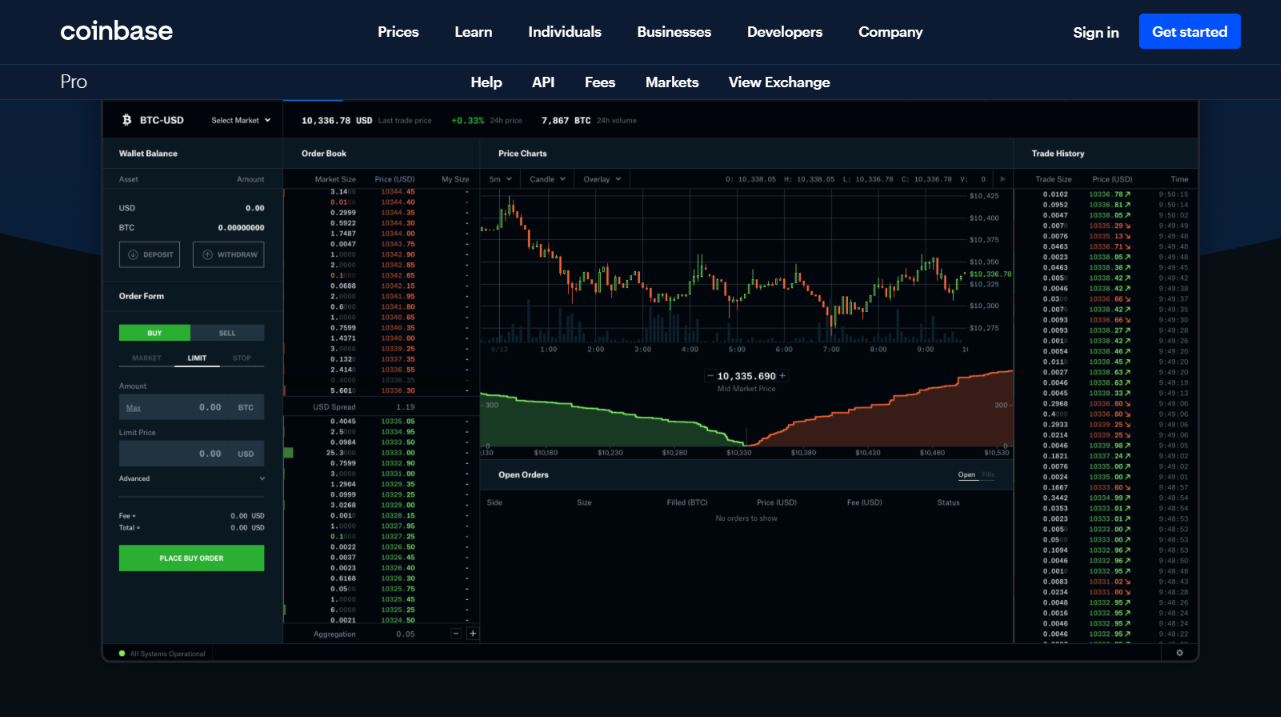
How to Use Charts while Trading on Coinbase
The chart is a graphical representation of the trends in a particular market, and a good understanding of it will help you make the right decisions when trading. However, just the chart alone can not provide adequate knowledge and technical support to help you make the most out of your trades in Coinbase.
In more specialized, traditional Forex trading platforms, there are countless chart tools, technicals, or drawings to help you study and exploit opportunities in the market. Coinbase seems to be including such tools gradually.
To explore a trading chart or do technical analysis on Coinbase, tap the “Overlay” tab on top of the chart page. It will display two EMAs (Exponential Moving Averages). An EMA gives more weight to the current closing price data and is a preferred technical analysis tool among many traders.
On Coinbase Pro, The EMA12 shows the closing prices within the last 12 days. It takes the EMA of the market each day and divides it by 12 days, and there’s also the EMA-26 which follows the same principle.
Turn on any of the EMAs to overview how the chart is moving and analyze the market. The EMA gives you a slight guide of the trends on the chart—whether the market is in an uptrend or downtrend so that you can know when to buy or sell.
You can also switch to another type of chart called the “Depth chart” tab above the page. The depth chart shows you the buyers and sellers in a particular market—the green area is the buyers, and the red zone is the sellers.
It goes beyond just the price to give you a visual overview of the volume of orders for buyers and sellers. However, depth charts and EMAs are not accurate predictors of the future of a market. Instead, they are used mainly by traders to gain insights into market trends.
You can see the “Trade History” at the right-hand side of the page—a long line of trades that other traders in the same market have done. The ‘trade size” column shows you how big the respective trades on the market have been.
Close to the “Trade Size” column are the “price” and “time” columns that show trade prices and the exact times the trades went through, respectively. The green figures under the price column represent buys while the red figures represent sells.
It also gives you a good understanding of the market. Traders often attribute more green figures (buys) to a good or promising market situation. You can study the trade prices and the chart to understand the price you’ll buy or sell out before entering an order.
The “Order book” is displayed on the left-hand side. Navigating to the order book will show you multiple buyers and sellers trying to trade the currency pair. Coinbase Pro gives you a “spread.” A Spread is a difference between the best bid (highest bid) and the best offer (lowest offer)—and it changes from time to time.
If you want to stop seeing every slight change in price on the order book, you can tap multiple times on the “+” or aggregator by the bottom left-hand side close to the order book. Doing that will aggregate price changes into larger groups to help you analyze market order choices.
How to Place an Order on Coinbase Pro
To place an order on Coinbase Pro, click on the “Trade” tab and select the currency pair you’d like to trade. There are three types of orders available to Coinbase Pro traders. They are the Market order, Limit Order, and Stop Loss order.
Market Order
The market order is the most basic type of order where you can not select your trading price, i.e., your preferred buying price. To place a market order;
- Click “Deposit” to add the amount of fiat currency worth of crypto you want to trade. You will automatically see the fees charged to your buy transaction and the total amount of the cryptocurrency you’re buying.
- Do a bank transfer to your Coinbase Pro or go to Coinbase.com and transfer it from there.
- Click on “Place Buy Order,” Which will automatically add your order to the order book and trade your crypto for you.
Since you have no control of the price you’re paying for the cryptocurrency you’re buying, your order will be completed with any matching sell order from the sellers on the order book.
There is almost no difference between entering an order on Coinbase.com and placing a “buy” market order on Coinbase Pro. The only difference is the lower fees and the presence of the limit order feature on Coinbase Pro.
Limit Order
A limit order is different from a market order in that it allows you to limit the price that you pay to trade crypto, which gives you control over the price. It means you only trade a certain amount of a select cryptocurrency at your price terms.
There are two columns to fill for a limit order transaction: the “Amount of Crypto” and the “Limit Price.” Here is how to buy with a limit order:
- Enter the amount of crypto you want to buy in denominations of the cryptocurrency and not in fiat currency
- Check the current price in the market just below the “Trade” tab to determine a reasonable limit price. If you place your limit price at or above the price in the current market, it will almost be the same as a market order. For instance, if the current market price is $37,500, it is advisable to place your limit price at $37,470 instead of $37,500 or $37,550
- Click “Place Buy Order.” Your order will automatically be added to the order book and reflected on the “Open Orders” section of your account—awaiting execution once there’s a matching sell order.
Stop Loss or Stop Order
The stop order is an extension of the limit order. A stop order is a limit order with an extra column for your Stop Price. A stop price functions the same way as a limit order, except in this case, it is a sell order. To trade a currency with a stop order using the $37,500 market price instance above;
- Enter your limit price of maybe $37,470, which becomes your buy limit order
- Enter a stop price of any amount that satisfies your analysis, which becomes your sell limit order. For example, it could be $36,000. Your stop price must be less than your limit price since it is a sell order or sell limit order.
As a trader performing the transaction above, you’re saying you want to buy a cryptocurrency, e.g., BTC, with $37,470 (limit price). However, if the trade goes against you, you want to sell your crypto at $36,000 (the stop price).
So, the reason for putting two limit orders—the buy (limit) and sell (stop) orders is to minimize your liabilities. Investors who just want to buy and hold crypto-assets don’t need stop losses. Only active day traders who want to cut their losses at unfavorable trades need stop losses to exit such trades.
Coinbase Trading Fees
Coinbase fees aren’t really bad. As we said earlier, Coinbase Pro will not charge you to create an account or hold your crypto as long as you want. However, you will pay a fee to trade currency pairs on Coinbase Pro.
Generally, Coinbase’s fee for trading is half a percent (0.50%) if you trade below $10,000 worth of cryptocurrency per month. But your charge starts dropping once you start trading above $10,00. Coinbase Pro runs the Taker-Maker fee model. Let’s take a closer look at Taker fees and Maker fees below;
Taker Fees
If you place an order at a market price that gets instantly filled or matched by another customer’s order, then you are the taker. Taker orders remove liquidity (drastic changes that affect market price), and you’d pay a taker fee of between 0.04% and 0.50%.
Maker Fees
If you place an order at a market price that does not instantly get filled or matched by another existing order, the order is added to the order book. When another user places a matching order, you become the maker. As a maker, you will pay a charge between 0.00% and 0.50%.
Partially Matched Orders
If you place an order that gets partially matched instantly, you will be charged a taker fee for the partially matched fraction. The other fraction will be added to the order book so that when matched, it becomes a marker order. You will then pay a marker fee for it.
How to Stake Crypto on Coinbase
Crypto staking is a common blockchain technology term that refers to holding or locking crypto assets to help in validating the transactions and security of a blockchain (information storage and processing system of a cryptocurrency). Staking is similar to mining which involves verification and addition of crypto transactions to the blockchain public ledger.
You can stake blockchains that support proof-of-stake (PoS) protocol. Proof-of-stake blockchains allow any user who stakes up to the minimum required amount to become a transaction validator and earn staking rewards. Popular proof-of-stake blockchains are Ethereum 2.0, Algorand, Cosmos, Tezos, Cardano, Polkadot, EOSOI, etc.
Eligible Cryptocurrencies for Staking on Coinbase
There are currently just four eligible cryptocurrencies that you can stake on Coinbase. They include:
- Ethereum 2.0 (ETH)
- Algorand (ALGO)
- Cosmos(ATOM); and
- Tezos (XTZ)
Eligible Countries for Staking
Not every country is eligible to stake crypto on Coinbase. Only users from the countries listed below currently qualify for staking on Coinbase.
- The US
- The UK
- Canada
- France
- Ireland
- Norway
- Spain
- Austria
- Slovakia
- Belgium
- Australia ( has DAI rewards already operational)
Please, note that Coinbase Pro exempts all Hawaii residents from staking while New Yorkers can not stake Ethereum, Tezos, and Cosmos.
Now that you’ve seen the eligible cryptocurrencies and countries for staking on Coinbase, let’s look step by step at how to stake crypto on Coinbase below:
- Sign in to your Coinbase account
- On your dashboard, click on the “Portfolio” tab and click on the eligible cryptocurrency you want to stake, for instance, Tezos.
- Navigate to the right-hand side of the page and turn on the staking switch beside “Tezos Rewards.” That will display your APY and your overall lifetime rewards.
Since there are only four tokens you could stake on Coinbase, let’s discuss each of them one after the other.
Staking Algorand (ALGO) on Coinbase
To stake ALGO, you must have a minimum of 0.01 ALGO. Ensure to turn on the “Algo Rewards” switch from your portfolio to earn rewards. Your ALGO rewards will be credited almost every day. You may not get your rewards if you remove ALGO or go below the minimum balance.
Staking Ethereum (ETH) On Coinbase
To stake ETH, you must have ETH in your wallet. No minimum balance is required. Remember to turn on the “Ethereum Rewards” switch from your portfolio. You will receive your first reward payment after about two weeks. Subsequently, you’ll receive a snapshot of your earnings daily.
Staking Tezos (XTZ) on Coinbase
To stake Tezos on Coinbase, you must have a minimum of 1XTZ and must have switched on the “Tezos Rewards” icon from your portfolio. You will receive your first earning after about 35-40 days, after which you’ll receive your rewards approximately every three days.
Staking Cosmos (ATOM) on Coinbase
You must have a minimum of 1ATOM in your wallet to stake ATOM. Business accounts are not allowed to stake ATOM; only individual accounts are permitted. Ensure to turn on the ATOM rewards icon from your portfolio. You will receive your first rewards payment between 7-14 days and subsequently within every seven days.
Other Security Measures for Your Coinbase Account
We’ve looked at the most basic form of two-step authentication—that’s through SMS. Authentication via SMS/Text is the default verification method while signing up on Coinbase, but it is the least secure authentication method. Let’s look at the more advanced authentication methods below;
Security Key Authentication
Two-step authentication or verification using security keys is the most secure technique. The reason is that it requires an attacker or hacker to have physical access to your digital information and your 2-step verification key.
Coinbase well supports all WebAuthn/ Fido2 standard security keys. If you need a security key, Yubico’s YubiKey is an excellent security key option. Also, note that enabling security key authentication will disable every previously set up two-step authentication method.
Coinbase allows you to add a maximum of 5 security keys. Adding more than one security key means enabling a backup option if you can’t find your primary security key. Also, once you disable your security, you automatically re-enable SMS as the default two-step authentication method. To set up your security key, follow these steps:
- Sign in to your Coinbase account
- Go to Settings > Security
- Select the “Security Key” option under “2-Step Verification.”
While using your security key, bear in mind that many security keys use adapters, but adapters with multiple ports could cause some issues. Also, third-party applications linked to your Coinbase account may not support security keys.
Duo and Google Authenticator (TOTP)
Duo and Google authenticators are applications that generate a TOTP (Time-Based One Time Password) depending on two factors—your phone’s current date and time and a secret key that’s known to just you and Coinbase.
Using The Authenticator app on your phone will scan a QR code that Coinbase will show you, representing your security key. This method follows security key authentication in terms of security level. Follow these steps to set up your Duo or Google Authenticator on Coinbase:
- Sign in to your Coinbase account on your desktop web browser with your current email, password, and 2-step verification method. The reason is that You can’t do authentication set up on Coinbase mobile app.
- Go to Settings> Security.
- Under the “Other Options” segment, click the “Select” button in the “Authenticator App” box.
- Carefully follow the prompts to finish the setup of your Authenticator App.
Note that enabling your authenticator app disables SMS authentication automatically while disabling it enables SMS authentication.
What Products Does Coinbase Offer?
Coinbase is popular among crypto users because it has one of the most user-friendly and fastest buying processes. It is more interesting because it is a US-regulated company—an advantage to US citizens and residents.
It creates an economy that is an efficient, fair, accessible, and transparent crypto-enabled financial system: its mission being to increase economic freedom in the world. In other words, it started as a solution to help people from all around the globe safely send and receive Bitcoin.
But now, it offers a slick platform that gives access to a broader range of assets in the crypto economy. US residents don’t need to file the FBAR (Foreign Bank and Financial Accounts Report) IRS Form for foreign accounts holding over $10,000.
Any user on the platform can trade Bitcoin Ethereum, Bitcoin Cash, Litecoin, etc., without first converting from their base currency into some other cryptocurrency. It is an easy and secure platform for users from more than 100 countries to invest, save, spend, trade, earn, and use crypto.
It also offers a wide range of products such as institutional custodial accounts, a digital currency wallet for retail investors, and the US dollar stable coin (USDC). Let us now look at the products and features offered by Coinbase in greater detail below so that you can better understand and appreciate the cryptocurrency exchange platform:
Coinbase Wallet
Coinbase has its digital wallet like other cryptocurrency exchanges. The digital wallet helps you to hold or keep your digital assets securely and on your device. There are different options for storing your digital currency.
The simplest option allows you to store your crypto assets on Coinbase Exchange: all you have to do is just buy a cryptocurrency and leave it in your account. However, this option doesn’t give you complete control of the security of your assets.
Instead, your assets’ security will depend on Coinbase’s security system and your account security. Another option allows you to move your crypto assets into Coinbase’s specialized hot wallet software called Coinbase Wallet.
But you will be required to download a separate application that gives you control over your private keys (security data), unlike holding your coins on Coinbase.com. Greater control over your crypto means that you can achieve more on the exchange.
You can move coins from one wallet to another and participate in decentralized financial activities that involve external crypto payments and transfers outside the exchange. However, if you’re more conservative and just intend to buy and store crypto assets for their long-term values, then you may just stick to holding your crypto on Coinbase.com.
The sweet side to the Coinbase mobile wallet application is its DeFi (Decentralized Finance) capability. Decentralized Finance is making waves in the cryptocurrency industry as DeFi projects work like traditional financial solutions on a blockchain. DeFi is what makes borrowing, lending, and investment of digital assets possible.
Coinbase has gone a step further, with powerful integrations in some of the most important DeFi projects. The most recent updates have admirably improved lending protocols on Coinbase. Coinbase Wallet allows you to select a cryptocurrency, analyze interest rates between DeFi protocols, explore the protocols, and view your crypto balance in a comprehensive dashboard.
While accessing Coinbase’s lending services, for instance, the Wallet keeps you abreast of the changes in interest rates over time so that it’s easy to see how much you’ve earned and withdrawn your crypto assets at will.
The DeFi protocols depend on collateralized borrowing to avoid default payments. That is to say; borrowers would have to lock up crypto assets as collateral before borrowing crypto.
Coinbase Pro
Coinbase Pro is Coinbase’s digital asset trading platform that looks to enable advanced traders to trade different digital assets securely and in an insured environment. The platform is designed for professional traders as it offers a more extensive asset base (currently more than 50 assets) than the conventional Coinbase.
With Coinbase Pro, you get better rates when you trade higher volumes and get incredibly broader and more robust trading and charting experience. That is to say, Coinbase Pro users can conveniently place stop orders and market limits with less Coinbase exchange fees, take on margin trading, enjoy excellent charting, and many more slick features.
Although Coinbase.com is a great platform for showing people how easily you can buy, hold, and move crypto, Coinbase Pro is a more improved platform for people interested in actively investing or trading with enhanced features and less fees.
Coinbase Pro traders can see short-term charts and use overlays such as exponential moving averages. With more than 100 trading pairs accessible worldwide and 40+ crypto-crypto trading pairs available in 42 regions, Coinbase Pro has no point to prove in the crypto industry. However, there’s still more to do compared to some other major trading tools around.
It’s understandable how virtually everyone attaches a “bg VIP fee” to the Pro versions of different products. Still, the good shocker is that it is completely free to open a Coinbase Pro account, and it’s much quicker if you already have the standard Coinbase account.
That said, if you’re just learning about the crypto industry, taking the first steps of your crypto adventure, or maybe you just want to hold your crypto assets on a long-term basis, then you may not need the “advanced” Coinbase Pro until you are ready to buy and sell coins actively.
The presence of two Coinbase versions implies the massive population of crypto investors will enjoy the features that suit them best. Newbies can explore the user-friendly and crypto-rich Coinbase, while advanced investors or professional users can put the feature-packed Coinbase Pro to good use.
It’s also vital to know that Coinbase Pro has made certain geographical restrictions. You may like to check it to ensure your country of residence is eligible to sign up on the platform—and which trading pairs (whether crypto/fiat or crypto/crypto) your country can access.
Coinbase Earn
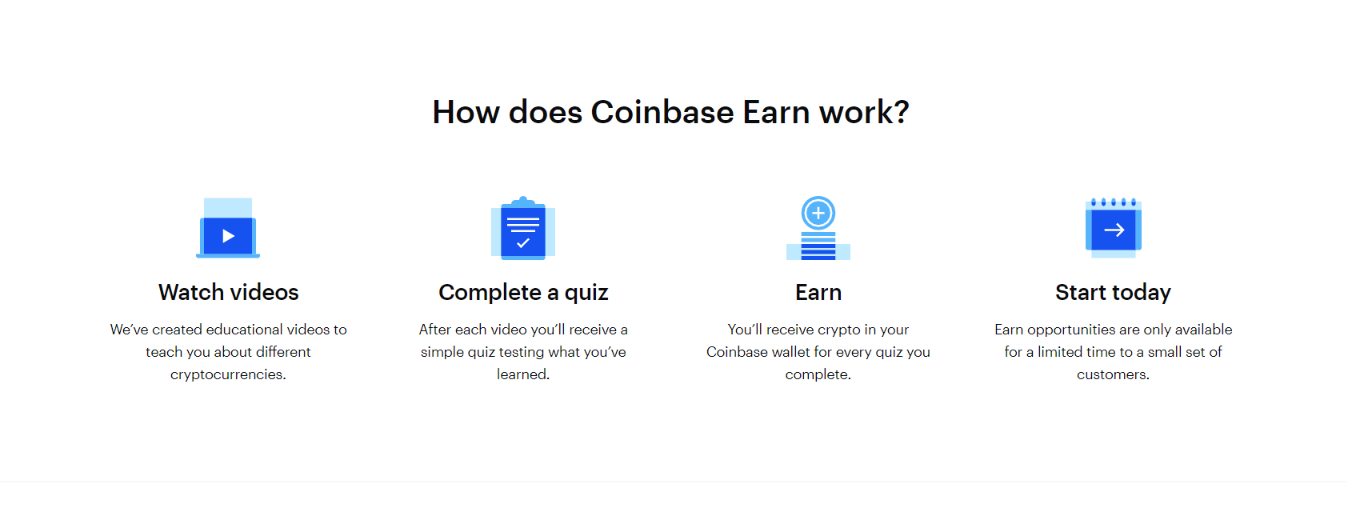
Gifting users crypto while learning about crypto sounds more like cooking and paying someone to eat the food. But jokes aside, Coinbase pays you to learn about crypto through its Learn Hub. Beginners in the crypto market need to be well-educated to make more informed investments and trade choices—and Coinbase fills that gap with its Learn program.
It gives crypto incentives to beginners when they learn about crypto on the Coinbase Learn Hub. To earn the free crypto rewards, you’d be required to watch the different videos on Coinbase—about a variety of listed crypto assets, after which you’d take a simple quiz and have the specified amount of crypto reward sent to your wallet.
The content on Coinbase’s Learning Hub also provides regular and updated information about the trends in the cryptocurrency market and recommends relevant resources that will help crypto investors—beginners especially.
As a learner in the Learn Hub, expecting up to $100 worth of coins at a single watch would be pretty lofty, seeing it’s free crypto. However, the highest currently is about $11 worth of Celo (CGLD)—which should be suitable for a gift.
Since altcoins (other growing cryptocurrencies aside from Bitcoin) aren’t the best option for long-term crypto investment, you can convert those gift altcoins into Bitcoin or Ethereum as soon as you earn them. You must also be careful to keep a record of these transactions as taxes get deducted for all crypto-to-crypto transactions.
Also, once you’ve earned above $600 from the program, you’d be issued a Form 1099-MISC form with which you can report your earnings—which is why you should keep track of the value of all your crypto earnings on Coinbase Earn. To start earning with Coinbase, you’d have to fund your Coinbase account, verify all your personal details, and live in an eligible country.
Coinbase Card
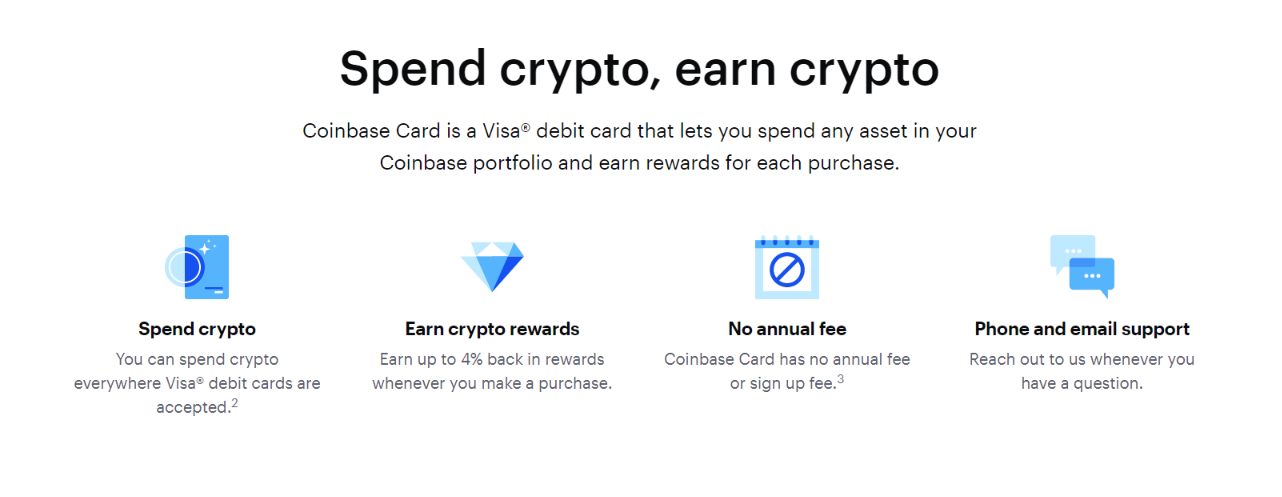
Ever thought about a crypto-funded debit card that can let you spend your money just the way you do with your local bank? Coinbase card is a Visa debit card that allows you to spend your Coinbase account balance.
One great feature of this debit card is that it lets you pay with your crypto anywhere in the world. Currently, the Visa debit card is activated for millions of locations all around the globe and enables contactless payment and cash withdrawal from any ATM around you.
Coinbase card also doesn’t come behind when it comes to security. With a two-step verification feature, instant card freeze, and other features, you can ensure your assets’ safety while running transactions.
However, the card is currently only available for customers on the waitlist in the United States and few selected European countries. You can check out the countries apart from the US where the card is available in this article.
Coinbase has incentivized spending with the card (for US users only) such that you can earn rewards when you spend with your Coinbase Card. The more you spend with the card, the greater your rewards will accumulate with time.
The card allows you to select which cryptocurrency you want to spend, and you can toggle between Bitcoin, Ethereum, and other digital currencies in an eyeblink. What’s more interesting is that you can track all your spending through transaction receipts and instant notifications.
Who Is Eligible for Coinbase Card?
You are eligible for the Coinbase Card if you:
- reside in the US aside from Hawaii
- have completed your identity verification with Coinbase and their bank partner. You should do this during the application process, and the team at Coinbase will contact you if more of your details are required.
- have read and agreed to be bound by the legal terms that apply to the Coinbase Card.
Coinbase Commerce
Coinbase Commerce is a product of Coinbase that’s developed for commercial ventures/websites. The solution allows website owners to accept cryptocurrency payments for their goods and services.
With Coinbase Commerce, your business can process crypto payments in minutes with zero fees attached. The feature affords you the power to be the master in charge of your business’s orders without any need for a middleman.
That’s to say, Coinbase wouldn’t hold your crypto. Instead, it will give you complete control of the hosted payment platform. Coinbase can help you set your business with a top-notch crypto-enabled checkout page with payment buttons, comprehensive invoicing, and other eCommerce integrations through the solution.
If you think about how secure Coinbase Commerce is, there’s nothing to worry about. You are looking at a payment solution from one of the safest and most trusted crypto exchanges in the world. Its high level of security has seen the solution partnering with notable eCommerce companies like Shopify and Woocommerce.
Transfer Crypto from Your Coinbase.com Balance to Your Coinbase Pro Account
Even though your Coinbase.com and Coinbase Pro accounts will automatically link together on signing up, you will still not have any holdings on Coinbase Pro.
That is to say, although funds are transferable between the accounts, your Coinbase account balance doesn’t automatically link with your Coinbase Pro balance. Let’s see how to transfer funds from Coinbase to Coinbase Pro;
- Sign in to your Coinbase Pro account
- On the right-hand side of your Coinbase Pro dashboard, click on “Portfolio.”
- On your portfolio, navigate to “Deposit” and click on it, and you’ll see the deposit options.
- Choose the crypto (Bitcoin, ETH, etc.) or fiat currency (Dollar, Euro, etc.) you want to transfer from Coinbase to Coinbase Pro.
- After selecting the currency you want to transfer, you will see two options to deposit crypto from another “Crypto address” or “Coinbase.com.”
- You will see two options: “Crypto Address” and “Coinbase.com.” You can transfer from another wallet like Trust Wallet or Coinbase Wallet from the “Crypto Address” option, but let’s use “Coinbase.com”
- Click on Coinbase.com. You will see your holdings and fees. Transferring from Coinbase.com to Coinbase Pro is entirely free!
- Enter the amount of crypto you want to transfer
- Click on deposit, and it instantly enters your Coinbase Pro balance
Conclusion
With the crypto economy becoming much more prominent than ever, people have many exchanges to buy and sell crypto. But despite the intense competition in the market, Coinbase has stood its ground all these years as the largest cryptocurrency exchange in the US.
Additionally, its enlistment on Nasdaq–being the first crypto exchange to do so–has further given a thumbs up to its reputation. There are over 50 cryptocurrency assets listed on Coinbase (with more being listed regularly) and many great features for beginners and professionals alike.
More admirable is the tight security on the exchange with two-factor authentication and other solid security measures. That said, if you are aspiring to invest for the first time in cryptocurrencies, Coinbase is a great exchange to launch into the crypto world. So, what are you waiting for? Sign up on Coinbase and smash your crypto goals!
Frequently Asked Questions (FAQs)
Coinbase exchange is a cryptocurrency platform that allows you to buy, sell, and store cryptocurrencies.
To buy bitcoin on Coinbase, you must first create an account and fund the account using fiat currency. Afterward, go to the Buy/Sell menu on the home page and follow the ensuing steps.
To buy Ethereum on Coinbase, you need an account on the platform. Fund the account and click on the Buy/Sell menu on the home page. Then follow the subsequent steps until you’ve got the Ethereum in your Coinbase.com account.
An individual is allowed to own a single Coinbase Pro account. You should use the same login email address you used for your Coinbase account to sign up on Coinbase Pro.
Yes, it is! According to Coinbase, less than 2% of customers’ assets are stored offline. Offline storage makes those assets almost impossible to be compromised by hackers. Meanwhile, if Coinbase suffers any online breaches, its insurance policy would pay for every loss invited by its customers.
Yes! There is a Coinbase Pro app for iOS devices, and it’s available on the Apple App Store. There’s also an Android app for Coinbase Pro on the Google Play store.
Yes, Coinbase is a genuine cryptocurrency trading platform that satisfies US laws and regulations.
There are several ways to improve the security of your Coinbase account. First, you must use a strong password. A strong password is usually a combination of uppercase and lowercase letters, numbers, and special characters.
It would be best if you also considered adding security keys—regarded as the most potent form of two-step verification to your Coinbase account. A popular security key is Yubico. But suppose you don’t want to use security keys just yet.
In that case, the closest security option is TOTP (Time-based One Time Password). TOTP uses a mobile authenticator app like Google authenticator or Duo. Above all, always secure your email.


